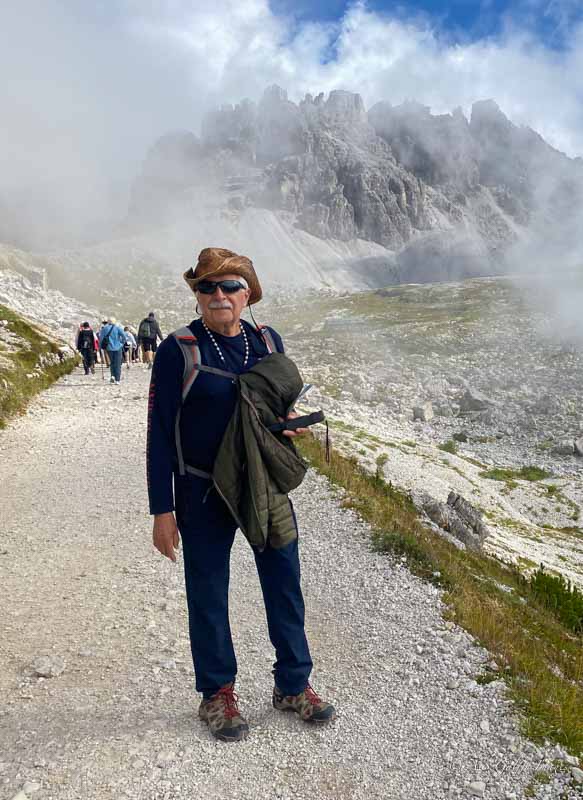
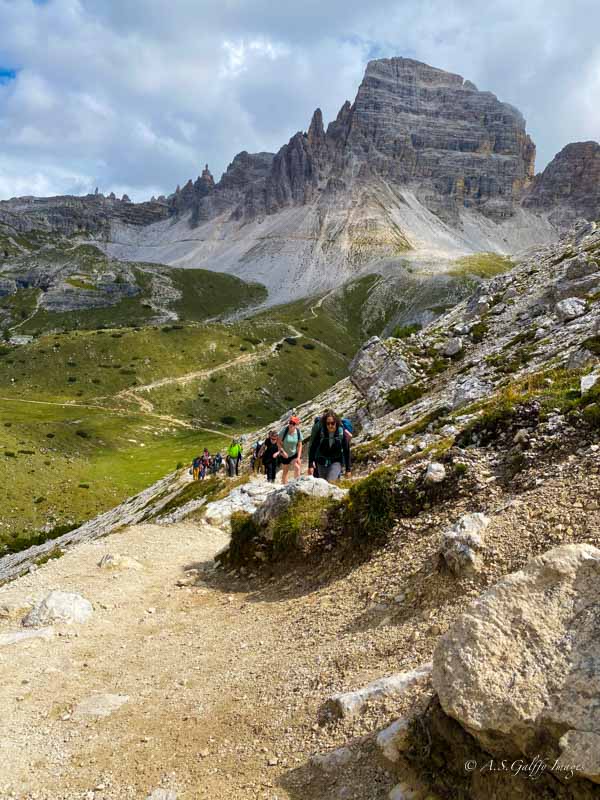
If there is one trek in the Dolomites that truly lives up to the hype, it’s the Tre Cime di Lavaredo hike. You get those postcard‑perfect peaks from every angle, a World War I battlefield under your feet, rifugi where you can stop for a break, and enough loose gravel and steep sections to remind you this is a real mountain trail, not a promenade in town.
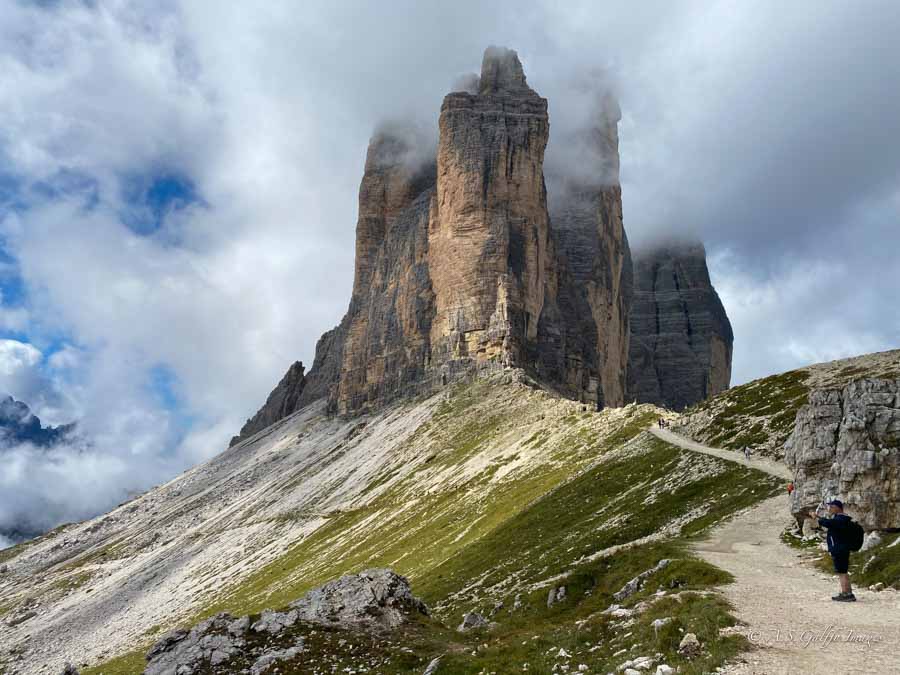
Tre Cime di Lavaredo circuit is undoubtedly the most spectacular hike in the Dolomites. The trail goes around three distinctive jagged limestone towers: Cima Ovest (the Western Peak) – 2,973 meters, Cima Grande (the central and highest peak) – 2,999 meters, and Cima Piccola (the Little Peak) – 2,857 meters. Renowned for their majestic appearance, the peaks are a symbol of the Italian Dolomites and enjoy the status of a UNESCO World Heritage Site.
We took a few hikes in the Dolomites last summer and absolutely fell in love with this area. In this guide I’ll give you all the information you need for hiking Tre Cime di Lavaredo circuit like a pro.
Quick Facts:
Trail type: Loop
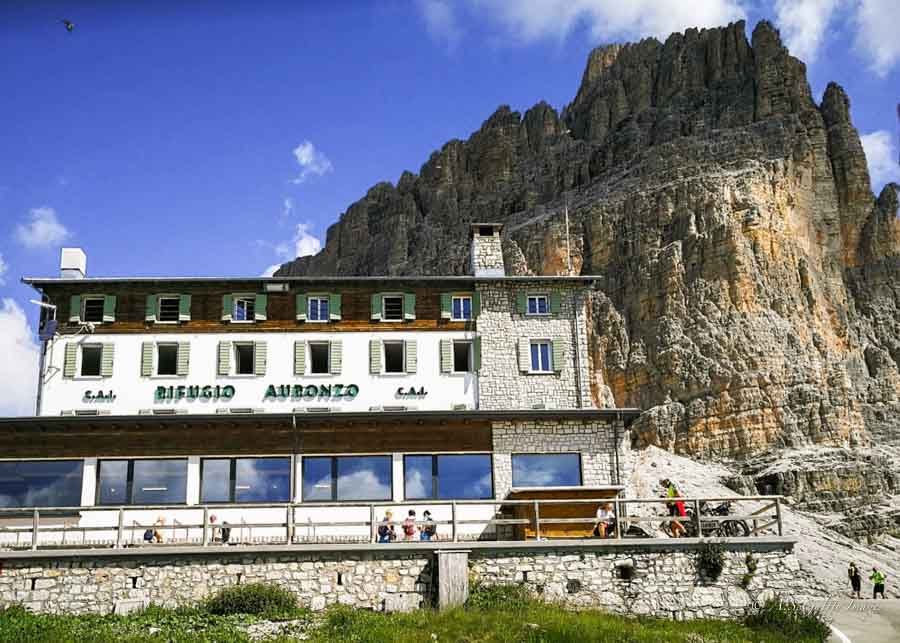
Start/End: Rifugio Auronzo car park
Distance: about 10 km (6.2 miles) for the full loop
Hiking time: 3.5–5 hours, depending on detours and photo stops
Elevation change: around 340–400 m (1,100–1,300 ft)
Highest point: approx. 2,450 m
Difficulty: easy‑moderate with some slightly difficult segments
Best season: late June to late September (snow dependent)
Facilities: several rifugi along the route, paid toilets, food and drinks
Park: Parco Naturale Tre Cime / Drei Zinnen Nature Park
Practical Information
How to Get to the Tre Cime di Lavaredo Trailhead
By car and toll road
- The main trailhead for Tre Cime di Lavaredo is at Rifugio Auronzo (2,320m). This is accessible by car via a paid toll road from Misurina, or by bus (No. 444 from Toblach/Dobbiaco and No. 50 and 51 from Cortina). Buses operate from June to October, with tickets costing roughly €9.50 – €12 one-way. By car, the drive takes about 40–50 minutes and parking costs €40 per car.
- In high season you now need a parking reservation for Rifugio Auronzo. Book as early as possible, especially for morning slots, as spaces are limited and can sell out quickly.
- The toll plus parking fee makes this one of the more expensive trailheads in the Dolomites, but it also saves you a long uphill approach.
Parking
Plan your hike for early morning and try to arrive before 8:00 am to avoid crowds and secure a spot closer to the Refugio. The parking lot is long and linear and lies directly at the base of the trail. If you are parked further down, it may take 15-20 minutes to hike from your car to the Refugio.
Tip: As of summer 2025, an online reservation is mandatory to drive to the Refugio Auronzo. You must book a specific slot in advance via the official municipality of Auronzo website.

Do You Need to Arrive at the Exact Time You Booked?
No – and this is where most people get confused. When you book a time slot it simply marks the beginning of your 12-hour access window. You can arrive anytime after your reserved time, as long as it’s within that 12-hour period. For instance, we booked a 8:00 a.m. entry and didn’t arrive until around 10:00 a.m., so we were still all right. This flexibility is especially helpful if you’re adjusting for sunrise, weather conditions, or a relaxed start to the day.
By public transport
Schedules vary by season, so check local timetables before you go and avoid assuming you can simply “wing it” with public transport.
In summer there are bus connections from nearby towns such as Dobbiaco/Toblach and Misurina to the Tre Cime area.
Some buses go all the way up to Rifugio Auronzo, while others stop lower down, from where you must either hike or take another shuttle.
Tre Cime di Lavaredo Hike: Pros and Cons
Pros
- Iconic Dolomites scenery from all angles. You circle the three peaks, so you don’t just get one “money shot,” you get an entire day of jaw‑dropping views.
- Several route options from easy to longer and tougher. You can do the full Tre Cime di Lavaredo big loop, stop at Rifugio Lavaredo or Rifugio Locatelli and turn back, or just grind up from Lago d’Antorno if you want to avoid the toll road.
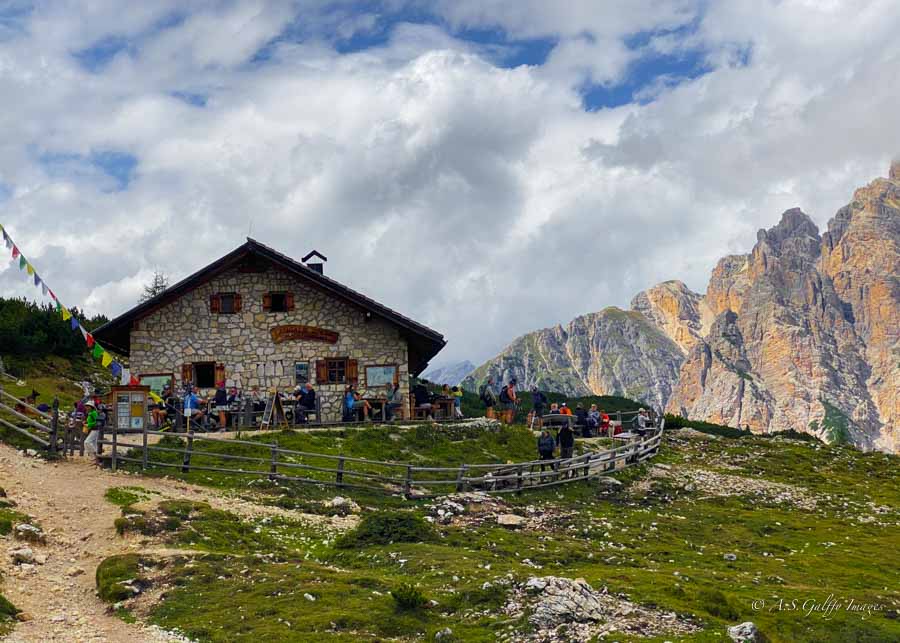
- Rifugi and facilities along the way. Four huts on the circuit mean real food, indoor toilets (for a fee), and a place to escape the wind if the weather turns.
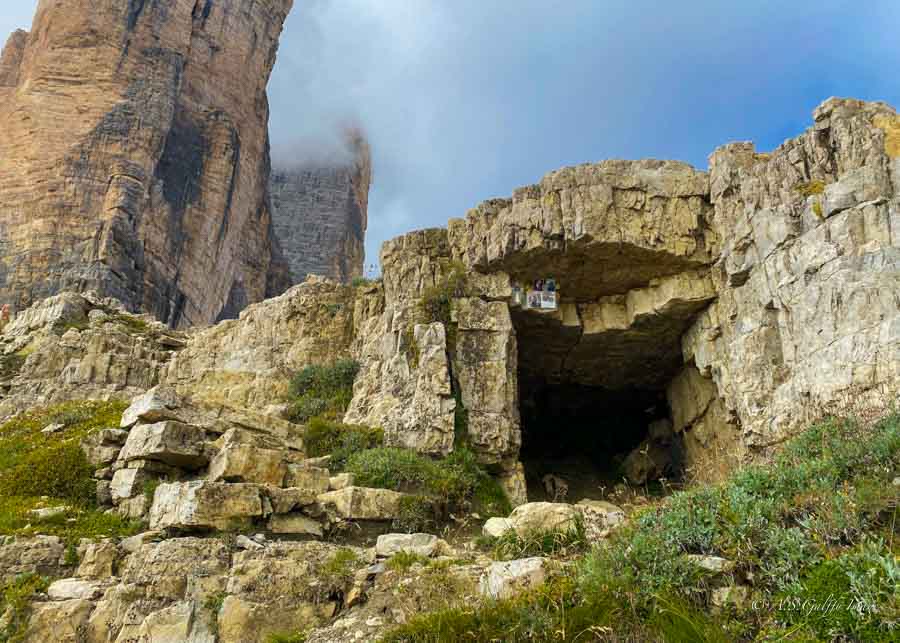
- History under your boots. The WWI tunnels, trenches, and fortifications around Monte Paterno and along the route make this much more than “just” a scenic hike.
- Logistically easy if you plan ahead. Clear way‑marking, a straightforward loop, and mandatory parking reservations mean less chaos than you might expect from such a famous trail.

Cons
- Crowds, and lots of them in high season. This hike is no secret. As a result, in July and August you’ll be sharing the trail (and every viewpoint) with what feels like half of Europe.
- Expensive and regulated road access. The toll road plus the obligatory online parking reservation at Rifugio Auronzo makes Tre Cime one of the priciest day hikes in the Dolomites.
- Loose gravel and short but punishing climbs. The final section toward Malga Langalm and some parts near Forcella Lavaredo are steep, slippery, and hard on the knees. Not ideal if you expect an “easy stroll.”
- High altitude and exposed terrain. Around 2,300 m, with almost no shade or shelter from sun, wind, or sudden storms. That makes it difficult when it’s very hot outside.
- Not the quiet, “hidden” Dolomites experience. If you’re looking for solitude or wild, empty trails, this isn’t it. Tre Cime is spectacular, but it feels very popular and managed.
What to Expect When Hiking the Tre Cime Big Loop
Tre Cime was one our most exciting hiking experiences, topped only by our hike to Laguna de Los Tres in Argentinean Patagonia. The trail isn’t technically difficult, but it is long and has a few sections that feel more demanding than the numbers suggest.

Hiking direction
For the best experience, I recommend hiking the Tre Cime di Lavaredo big loop in a counter‑clockwise direction, starting from Rifugio Auronzo on Path 101. In this direction you ease into the hike with wide‑open panoramic views, then gradually work your way toward the dramatic north faces of the peaks.
Pacing and photography
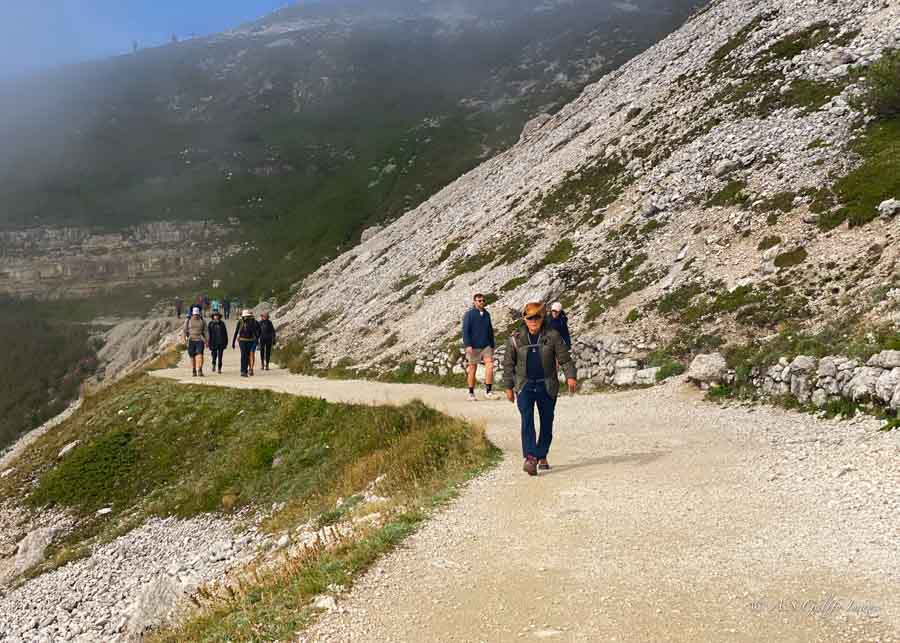
The path from Rifugio Auronzo to Rifugio Lavaredo and up to Forcella Lavaredo is gradual and relatively flat, which makes for a gentle warm‑up and gives you time to adjust to the altitude and the crowds. Hiking this way also keeps the best views on your left and, if you start in the morning, gives you much better light for photos.
Distance, time, and altitude
The classic big loop is about 10–11 km (around 6.5 miles), with roughly 400–500 meters of elevation change. At an average altitude of about 2,300 meters, most people don’t need special acclimatization, but you will notice the thinner air on the climbs. Plan on 4–5 hours if you want to enjoy the rifugi, take photos, and explore some of the viewpoints rather than rushing.

Difficulty and terrain
The trail is well marked and very popular. Hikers in good condition will find it manageable; older or less experienced hikers may find some parts moderately challenging. For us, the toughest section was the final stretch toward Malga Langalm, where the steep ascent on deep, loose gravel really tested tired legs. Some people also find the trail up to or down from Forcella Lavaredo demanding, but it felt less tricky than that last gravelly climb. Much of the loop is on loose gravel and stones, so careful footing is essential, and I strongly recommend hiking poles even if your knees are usually fine.
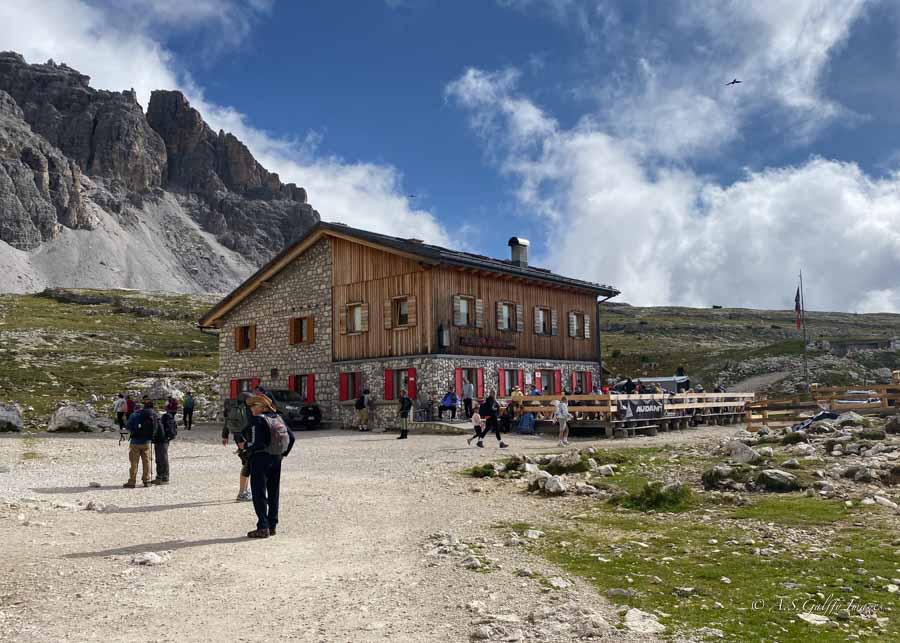
Huts along the way
The hike starts at Refugio Auronzo, but along the loop you’ll pass Refugio Lavaredo, Refugio Locatelli (on the north side of he peaks), and Refugio Malga Langalm on the return Path 105. They provide good stops for food and drinks, if you need a break.
What Not to Miss:
During World War I, Tre Cime di Lavaredo was a battleground and fortress for Italian soldiers fighting Austro-Hungarian forces. Therefore, you can still see the tunnels, trenches and artillery where the battles took place. The WWI tunnels, known as the Gallerie del Monte Paterno are carved in the rock of Monte Paterno, adjacent to the main hiking trail from Refugio Auronzo leading to Forcella Lava
Tre Cime di Lavaredo Big Loop: Step‑by‑Step Trail Guide
1. Rifugio Auronzo to the chapel
- Start from the main car park at Rifugio Auronzo. You’ll see a wide gravel trail heading east along the south face of the peaks.
- This section is almost flat and very busy, with constant views over the valleys and surrounding mountains.
- After about 20–25 minutes, you reach a small chapel (Cappella degli Alpini), a good spot for quick photos and a first water break.

2. Chapel to Rifugio Lavaredo
- Continue along the same main path. It narrows a little but remains easy underfoot.
- Rifugio Lavaredo appears ahead of you, tucked under the rock walls. It takes another 15–20 minutes to reach it.
- If you’re unsure about the full loop, this is a point where you can reassess how you’re feeling and the weather before continuing.
3. Rifugio Lavaredo to Forcella Lavaredo
- Just past the rifugio, the trail starts to climb more steeply toward the saddle of Forcella Lavaredo.
- The path is still broad, but you may feel the altitude here if you’re not used to it.
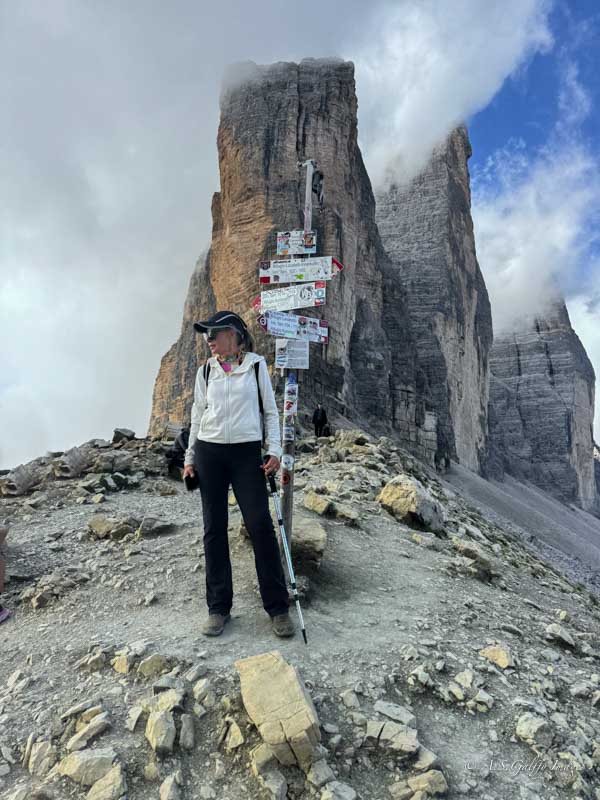
- At the top of the saddle, Forcella Lavaredo offers your first real view of the famous north faces of the three peaks. This is one of the classic viewpoints and a place where many people turn back.

4. Forcella Lavaredo to Rifugio Locatelli (north side)
- From the saddle, the trail contours around the base of the peaks and then gradually descends on the north side.
- The views become more dramatic, with the three towers on your left and the Lakes of Piani and Monte Paterno ahead.
- The path is narrower and rockier here, and it can be slippery when wet. Take your time; this is not the section to rush through while taking photos.
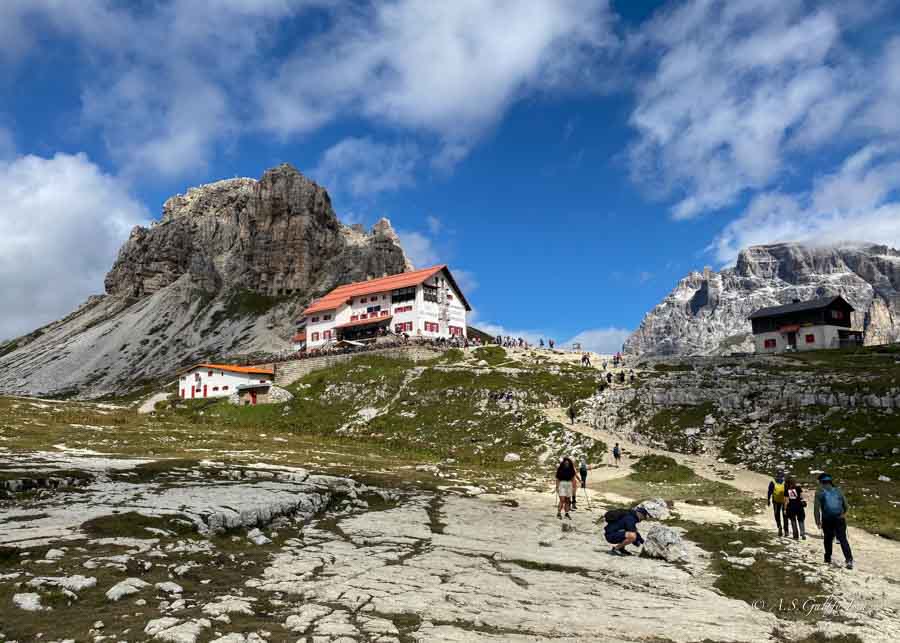
- Eventually you’ll reach the area around Rifugio Locatelli, where paths spread out and people scatter across the hillside to sit and enjoy the scenery.
5. Detours: WWI tunnels and Lakes of Piani (optional)
- From the Rifugio Locatelli area, you can make short detours to explore some of the World War I tunnels and trenches, or to get closer views of the Lakes of Piani.
- These side trips add time and a bit more effort, but if you’re interested in history and don’t mind a little extra climbing, they are absolutely worth considering.
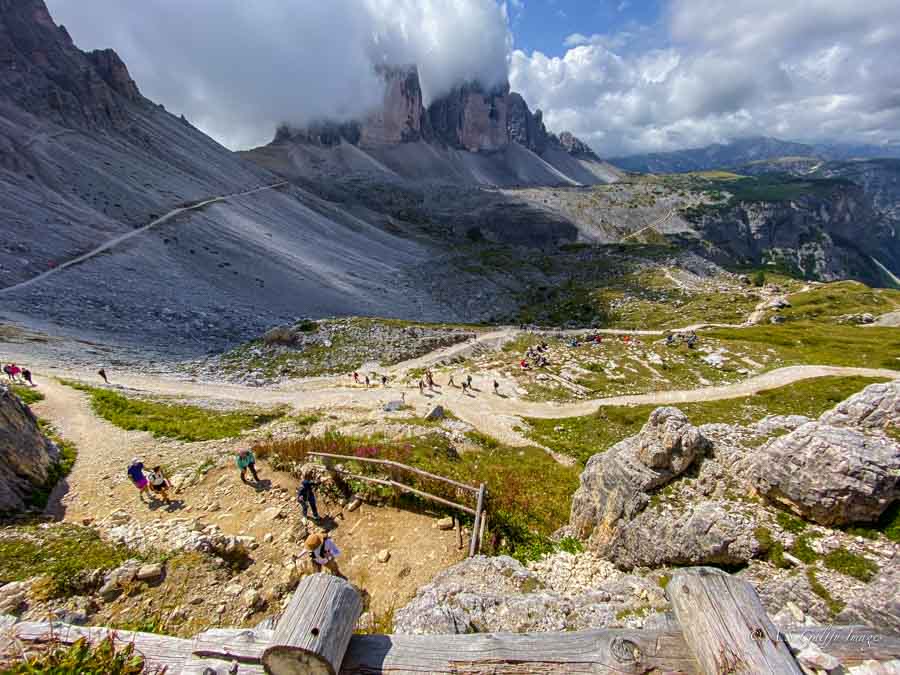
6. Rifugio Locatelli to Malga Langalm
- To continue the big loop, follow the signs leading away from Rifugio Locatelli across the valley. The trail descends on sometimes loose terrain before flattening out a bit.
- The landscape opens up here and feels more remote, with fewer people continuing beyond the rifugio.
- After crossing the valley, the path climbs again toward Malga Langalm. This is a steady, sometimes steep ascent that can feel long at this point in the day.
7. Malga Langalm back to Rifugio Auronzo
The final stretch is straightforward but can feel tiring if the sun is strong and the trail is busy.
Hiking options at Tre Cime di Lavaredo
When I started planning our Tre Cime di Lavaredo hike, I didn’t realize there are so many ways in which can experience these peaks. You don’t have to commit to the full loop to get amazing views. However, if you have the time and strength, that’s still the option I recommend most.
Tre Cime di Lavaredo Circuit (The Big Loop)
The classic Tre Cime di Lavaredo circuit is the full big loop around the three peaks, roughly 10–12 km (6–7.5 miles) long. It starts at Rifugio Auronzo and heads counter‑clockwise on Path 101 past Rifugio Lavaredo and up to Forcella Lavaredo, before wrapping around the north side towards Rifugio Locatelli and then returning via Path 105 through the valley.
This is the option we chose, and if you only have one day here, it’s the one I recommend. It’s a moderately challenging hike, not because it’s extremely steep or technical, but because it’s long and has a few sections with loose gravel where you really need to watch your footing. The payoff is that you see the peaks from every angle: the “soft” side at the beginning, the sheer north faces later on, and then those postcard‑perfect views as you close the loop.
Rifugio Auronzo to Rifugio Lavaredo and back
If you’re short on time or not sure the full loop is for you, the easiest option is to hike from Rifugio Auronzo to Rifugio Lavaredo and then return the same way. This out‑and‑back is about 4 km in total, mostly flat, and stays on a wide, well‑trodden path.
You still get wonderful views of the surrounding Dolomites and the south side of the peaks, and you feel very much “in” the landscape without committing to hours on the trail. I think of this as the “taste of Tre Cime” hike – perfect if you’re traveling with less experienced hikers, children, or if the weather looks unstable and you don’t want to risk being far from the trailhead.
Rifugio Auronzo to Rifugio Locatelli and back
A more ambitious option, if you don’t want to do the complete loop, is to hike from Rifugio Auronzo all the way to Rifugio Locatelli (Dreizinnenhütte) and then return the same way. This out‑and‑back is about 9.5 km with 350–400 m of elevation gain and takes roughly 2–3 hours, not counting photo stops and breaks.
The reason many people choose this option is simple: the view from near Rifugio Locatelli of the north faces of Tre Cime is the most famous panorama of the hike. Getting there and back does mean repeating the same route, but you still pass Forcella Lavaredo twice and enjoy that dramatic scenery in both directions. If your priority is that iconic view rather than the full circuit, this is a very good compromise.
Rifugio Auronzo to Rifugio Langalm
One of the quieter options is walking from Rifugio Auronzo to Rifugio Langalm (Lange Alm). This route takes around 1.5–2 hours (approximately 5 km) and is best done by taking Path 105 behind Rifugio Auronzo in a clockwise direction.
The trail is generally flat to gently undulating and feels less busy than the main section between Auronzo and Lavaredo. What I like about this option is that you get direct, frontal views of the vertical walls of Tre Cime without committing to the entire big loop. If you don’t mind skipping Rifugio Locatelli but want something more peaceful, this is a lovely choice.
Lago d’Antorno up to Rifugio Auronzo
Finally, if you want to save on the toll road or parking at Rifugio Auronzo, or if you simply enjoy a tougher climb, you can hike up from Lago d’Antorno to Rifugio Auronzo instead of driving. This is a relatively short but steep ascent that gains a lot of elevation in a compact distance.
I’d only recommend this option if you are fit, used to hiking uphill, and comfortable with the idea that your “warm‑up” is actually a sustained climb. The reward is that you earn your first glimpse of Tre Cime the hard way and avoid the expense of driving all the way up.
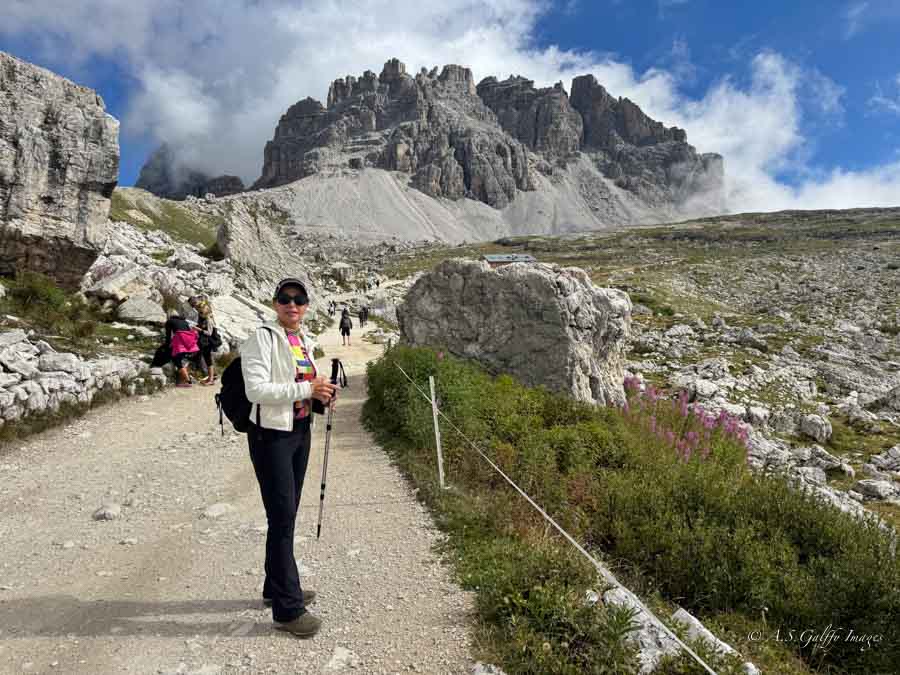
Our experience on the Big Loop
We hiked the Tre Cime di Lavaredo big loop on a clear summer day and, even though I’d seen the famous photos a hundred times, the real thing still felt bigger and more dramatic than I expected. From the first steps leaving Rifugio Auronzo, with the three towers on one side and the Dolomites rolling away on the other, it was obvious this wasn’t just another popular trail.

What I loved most was how the views kept changing. The initial stretch from Rifugio Auronzo past the small chapel to Rifugio Lavaredo felt almost like a high‑altitude promenade: wide path, gentle terrain, and plenty of people, but already beautiful.
The mood shifted at Forcella Lavaredo. Standing on that saddle, suddenly face‑to‑face with the sheer north walls of the three peaks, was our first real “wow” moment.
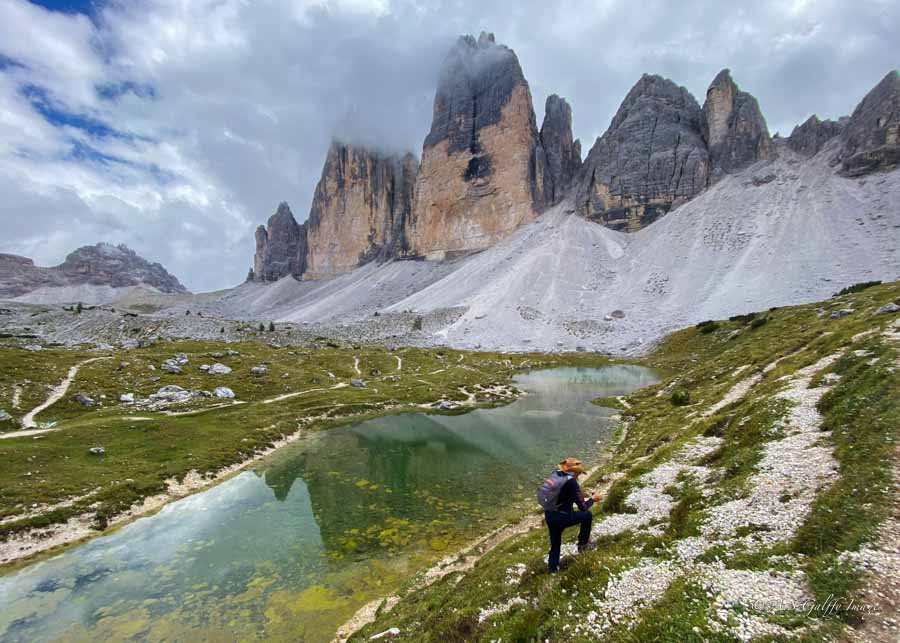
My favorite part was the traverse on the north side towards Rifugio Locatelli. The trail narrows, the terrain becomes rougher, and the landscape feels wilder. With the cliffs of Tre Cime on one side and deep valleys and rocky ridges on the other, it was impossible not to stop constantly for photos. Reaching the area around Rifugio Locatelli, we finally got that classic postcard view; sitting in the grass and just staring at the towers was one of the highlights of our Dolomites trip.
The most challenging section came after Locatelli, on the descent into the valley and then the steady climb toward Malga Langalm. By then my legs were tired, and the loose stones and uphill stretches demanded more effort. The final undulating path back to Rifugio Auronzo felt long but satisfying. Walking into the busy car park, dusty and pleasantly tired, I understood why this loop is so famous: not because it’s the hardest, but because it’s simply unforgettable.
When is the Best Time to Hike Tre Cime
- Best months: Generally late June through late September, depending on snow conditions. Early in the season you may still encounter snow patches; late season brings cooler temperatures and fewer crowds.
- Best Time of day: Start as early as you can. A morning start not only helps with parking and crowds but also gives you a better chance of avoiding afternoon thunderstorms, which are common in the Dolomites in summer.
- Weather: Mountain weather changes quickly. Even if the forecast looks good, bring layers and be prepared to turn back if clouds build up or visibility drops. If visiting at the start or end of the hiking season, it’s best to check whether the toll road is open by contacting the Auronzo tourism office – [email protected]

Where to Stay Near Tre Cime di Lavaredo
There are a few lodging options in this area of the Italian Dolomites which include:
- Dobbiaco/Toblach: A convenient hub with a good range of hotels and easy road access towards Tre Cime and other Dolomites hikes.
- Lago di Misurina: Very close to the toll road, ideal if you want to drive up early in the morning.
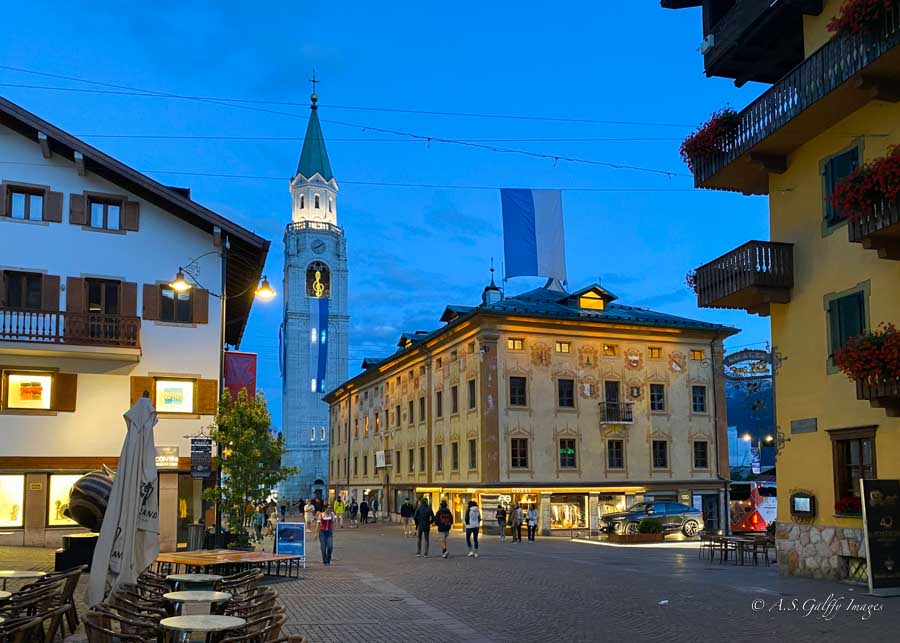
- Cortina d’Ampezzo: A bit further, but a charming base for a longer Dolomites stay with plenty of other hikes and via ferrata nearby.
We stayed in Cordina d’Ampezzo because it was in the middle of all the hikes we did in the Dolomites. But if you want to extend the experience, you can also consider staying in a rifugio along or near the loop. However, you’ll have to book well in advance because these mountain huts are extremely popular in summer.
What to Pack for the Hike
There are a few essentials that we always pack, whether we hike in the Chilean Patagonia, in Arizona, or Hawaii:
- Sturdy hiking boots or trail shoes with good grip (the loose gravel sections are not sandal‑friendly).
- Layered clothing: base layer, light fleece or sweater, and a waterproof/windproof shell.
- Sun protection: hat, sunglasses, and high‑SPF sunscreen – there’s almost no shade on this hike.
- 1.5–2 liters of water per person, plus snacks even if you plan to eat at the rifugi.
- Trekking poles, especially if you have sensitive knees or ankles.
- A small first‑aid kit and any personal medication.
- Offline maps or a GPS app, even though the main route is well marked – it never hurts to have your own navigation.
Note: toilets at the rifugios along the Tre Cime di Lavaredo trail do require payment. Typically they charge €1 per use, so having some change on you is helpful.
Is the Tre Cime di Lavaredo Hike Worth It?
In a word: yes – with realistic expectations. The Tre Cime di Lavaredo big loop is not a quiet wilderness hike, and the cost and crowds can be off‑putting. But if you approach it as a high‑alpine walk around one of the most iconic mountain formations in Europe, with the comforts of rifugi and the bonus of WWI history, it becomes a very special day.

For us, Tre Cime was one of the highlights of our Dolomites trip because of the combination of stunning scenery, varied trail, and good photo ops. On this hike, the reality really does match the pictures.

Frequently Asked Questions
For most hikers, yes, as long as you come prepared. The trail is well‑marked, non‑technical, and busy in season, but there are steep sections with loose gravel and some exposure, especially on the return toward Malga Langalm, so good shoes, trekking poles, and checking the weather are important.
Considering that the big loop is a moderate hike for most reasonably fit hikers, I’ say that active beginners can safely do it. As for children, small kids can do the easier stretch from Refugio Auronzo to Refugio Lavaredo. For the Big Loop, I would only recommend it for children 15 years or older used to do longer and more strenuous hikes.
Yes, the main loop is very easy to follow if you stick to the signed paths (101 and 105) and pay attention at junctions. In summer there are usually plenty of other hikers around, but I still recommend having an offline map on your phone so you can double‑check your position if you’re unsure.
Technically you can hike if the forecast is mixed. However, storms and low cloud can make the trail unpleasant or dangerous, especially on the more exposed sections. At this altitude the weather changes quickly, so if you see thunderstorms building or visibility dropping, it’s better to cut the loop short and head back toward Rifugio Auronzo.
YOU MAY ALSO LIKE:


